Recently, my son participated in a CoderDojo workshop where he built a line-following robot. Inspired by his project, I decided to try something similar at home.
The Design
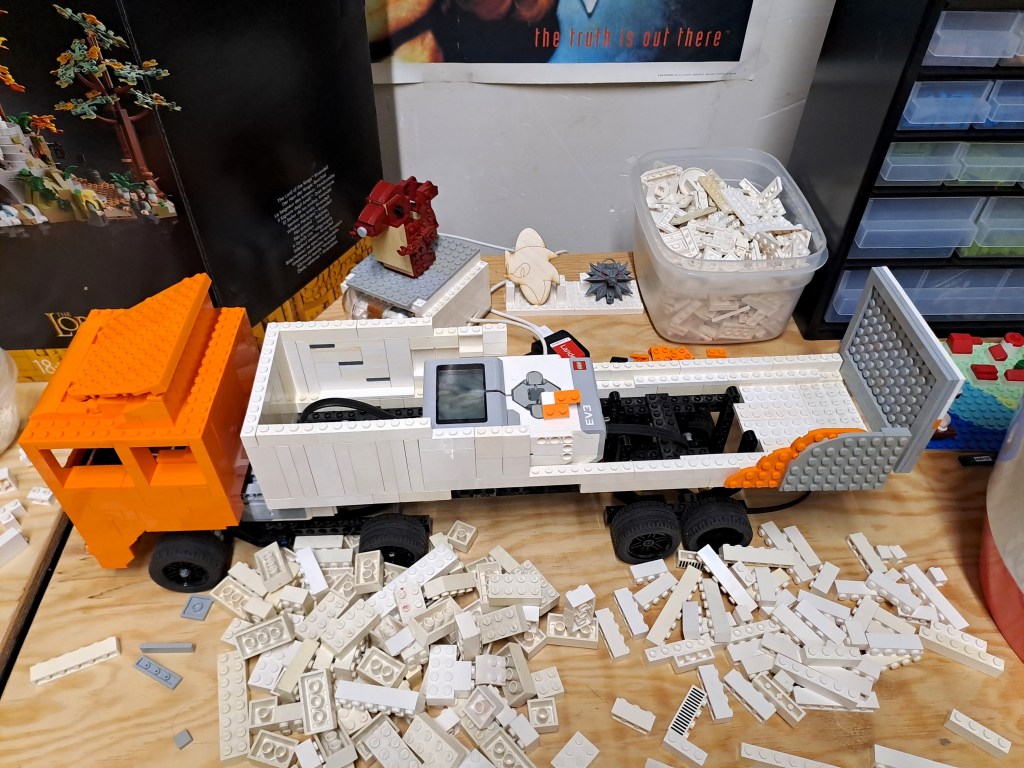
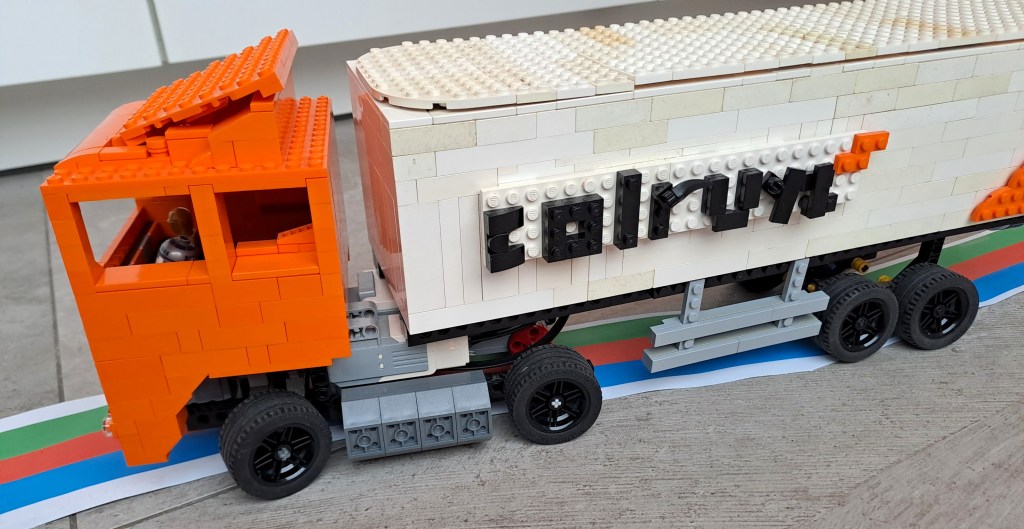
As you might have guessed from some previous posts, I work for the Belgian Retailer Colruyt Group. So naturally, I based my design on a typical Colruyt truck. This meant using almost every orange Lego brick I could find!
The truck is powered by two motors: one for driving and one for steering. A color sensor is mounted at the front, while the trailer houses the EV3 computing brick and the sensor for the remote control.


First test
For the initial test, I manually controlled the truck using a remote—so it wasn’t self-driving just yet.
Programming
With the building phase complete, it was time to dive into programming.
Initial idea: Follow the line
My first approach was to place colored tape on the floor and have the truck follow it using the color sensor.
If the truck lost track of the tape, it would reverse until it detected the tape again, then turn left or right to stay on course.
While this seemed like a simple and effective solution on paper, it turned out to be quite tricky in practice.
Not your typical line-following robot
Unlike small, compact robots, my truck has a large trailer, which makes reversing more challenging—it heavily depends on the trailer’s position.
Additionally, the truck’s turning radius is quite wide, much like a real truck.
The Lego Education site provides instructions for building a standard line-following robot. These designs usually resemble tanks, capable of quickly rotating in place when they lose the line.

However, my truck’s design required a different approach due to its large turning radius.
A new approach: Colored path
To work around these challenges, I modified my approach and created a three-color path:
- Red: Drive straight ahead
- Blue: Too far left – turn right
- Green: Too far right – turn left
With this setup, the truck no longer needed to stick perfectly to the path. It could take wider turns as long as it continued rotating in the correct direction.
The Code
Here’s the code I used, written in the Lego Mindstorms Home app:

The result
And it works! Check out the video below to see the truck in action.
(Quick note: I’ve slightly sped up the video. The truck can drive at higher speeds, but at times, the sensor fails to detect the colors correctly. Running it at lower speeds improves accuracy.)
Similar projects
Here are a few other Lego Mindstorms EV3 projects: