The idea
The idea for this project started with the Ninjaline (see my previous blog post)
Next to the Ninjaline itself, we also found a Ninja Timer button on Amazon. A great idea to add more competition to the game.

Unfortunately, Amazon wasn’t shipping this to Belgium, and we couldn’t find any other alternative online.
So my wife challenged me to build one myself. I gladly accepted this challenge!
The parts
Luckily, I already had a Raspberry Pi (model B+), that I have used for my RetroPie project.
I ordered the following extra parts via Kiwi Electronics:


Note: you can order all these parts from Adafruit as well
The setup
I was new to physical computing with the raspberry pi, but there are tons of great tutorials around the web. This tutorial was particularly easy.
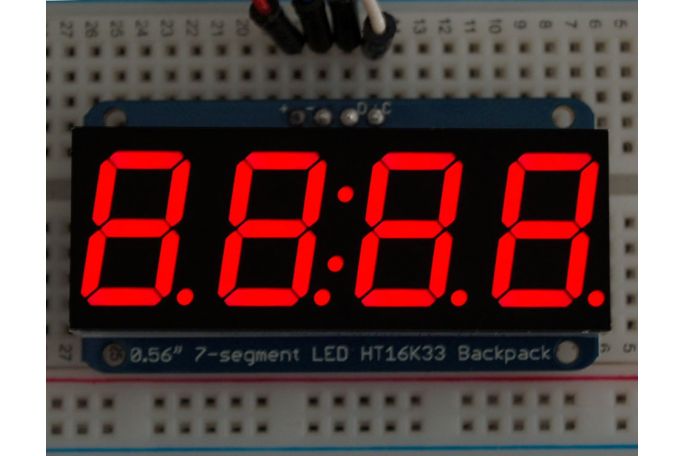
Once the basics were clear, it was time to move on to the LED display.
As a first step, you need to do some soldering. This was new for me, but luckily there are plenty of Youtube tutorials out there. It was less difficult than I thought, thanks to the clear tutorial on Adafruit.
Unfortunately, the Adafruit tutorial only explains how to use the LED display on an Arduino. They do have a second tutorial however, then explains how to use your display with a Raspberry Pi.
The packaging
While developing, you might put your Raspberry with all wires and components next to your computer. But once you’re done, it is nice to give it a more permanent place.
A shoe box might come in handy. Especially if you use some spray paint to give it a finishing touch.

As you can see on the inside, I used a power bank as the power supply. This make my timer button ultra-portable!

The coding
After all the previous steps, you just have a fancy box that doesn’t do anything yet. Time for the heart of the project: the coding!
I wanted the following behaviour:
- If you press the giant button, a countdown timer begins: 5…4…3…2…1…
- After that, the actual timer starts counting the seconds: 00:01, 00:02, 00:03, …
- When you press the button again, the timer stops, and your time is displayed for a few seconds.
- After that, the screen goes blank, and you can start all over.
Here’s the coding:
#!/usr/bin/python # Timer with button in combination with ADAfruit LCD import time from gpiozero import Button from subprocess import check_call from signal import pause from Adafruit_LED_Backpack import SevenSegment # Create display instance on default I2C address (0x70) and bus number. display = SevenSegment.SevenSegment() # Initialize the display. Must be called once before using the display. display.begin() #inits status = 'Stopped' colon = False print(status) display.clear() display.print_number_str(' ') display.set_colon(colon) display.write_display() #define procedure def StartTimer(): status = 'Countdown' print(status) #initialisation countSpeed = 1 showResultTime = 10 colon=False #countdown to begin i=5 while i>0: print(str(i)) display.clear() display.set_digit(3,i) display.set_colon(colon) display.write_display() time.sleep(countSpeed) i-=1 #start timer colon=True status = 'Timer running' print(status) hundreds = 100 minutes = 0 seconds = 0 while not button.is_pressed: time.sleep(0.01) hundreds+=1 if hundreds>=100: print(str(minutes).zfill(2) + ':' + str(seconds).zfill(2)) display.clear() display.print_number_str(str(minutes).zfill(2) + str(seconds).zfill(2)) display.set_colon(colon) display.write_display() hundreds=0 seconds+=1 if seconds>=60: seconds=0 minutes+=1 if minutes>99: break #show result status = 'Show result' print(status) time.sleep(showResultTime) #end timer colon=False display.clear() display.print_number_str(' ') display.set_colon(colon) display.write_display() status = 'Stopped' print(status) return; def ShutDown(): print('Shutting down') check_call(['sudo', 'poweroff']) #button code button = Button(14,hold_time=5) button.when_pressed = StartTimer button.when_held = ShutDown pause()I did face some challenges, though.
Challenge 1: threads
Initially, I thought that the button press would act as an interrupt, and that I could control the entire flow from there.
Something like:
- if button is pressed and status is stopped, then start the timer
- if button is pressed and status is running, then stop the timer
It didn’t work.
My program is a single thread, so if the timer is running, my button presses don’t do anything.
So I had two options:
- Introduce threads
- Work with a single thread and code it differently
I went for the second option. As you can see, I regularly check for button presses in my timer loop.
Challenge 2: counting the time
For this, I could either use the system time or let the program sleep.
I chose the sleep option, since that way I don’t need polling, and I use less CPU.
In a first version, I increased the seconds, and then I put the program to sleep for a second. During that second, it was possible that there was a button press that wasn’t caught properly (since the program was sleeping).
In a second version, I counted the hundreds of seconds instead of seconds. That way, I didn’t miss any button presses anymore. I was also refreshing my display every hundred of a second, but that caused some flickering.
So in the final version, I counted the hundreds of seconds, but I only refreshed my display every second.
Works like a charm!

5 thoughts on “Timer Button with Raspberry Pi”